Green Poncho
Back in June-ish of 2015 I came across this image (which I do not have the attribution for)
 and really wanted to make it for myself.
I didn't really come across a true pattern, but (with help from my mom) finally came across these schematics (which I also don't have attribution for)

 and was able to make it with help from a friend of my mom's who had a large-scale printer and sewing experience! We had to make a mini version in paper to figure out how everything went together.
I chose a green polar fleece fabric, so that it would be nice and cozy. This was all machine sewn. As this was my first 'real'/major sewing project, I didn't really take any pictures of the process. But here are the basic steps that we wrote down:
Here is the approximate method that I used to make the poncho. I'm sure there are other ways it can be done.
You'll need two of every pattern piece except for the hood front. (Ben provided them already, with the regular and the mirror image pattern pieces). You only need one hood front. If you have 58-60" wide directional fabric, you'll need about 3 yards. You'll obviously need more for narrower fabric. A few of the pattern pieces don't have all the lines drawn on them, but it should be pretty obvious which lines are missing.
Seams are 1cm. Grain lines are marked on the pattern pieces.
1. Sew the sides of the hood to the hood front. Sew the seam that runs from the top of the hood down the back of the hood. Hem the face opening. Set this aside for now.
2. Make the welt pockets for each of the front pieces. Each pocket will use the rectangular welt piece and the two pocket pieces. We followed this tutorial: http://www.craftsy.com/article/sewing-welt-pockets
3. Sew the seam down the center of the back pieces. Sew the front sleeve to the back sleeve at the shoulder line (for each sleeve). The back sleeve has the pointy top while the front sleeve has a more rounded top.
4. Sew the back of the poncho to the back of each sleeve, down to the proper spot (there is a mark on the pattern pieces).
5. Pin the two front pieces to the sleeve fronts, lining them up so they overlap in the correct way. Fold down the edge of the fronts as you pin them since they will need to be hemmed later. Sew this seam down to the proper spot (there is a mark on the pattern pieces)
6. Pin and sew the underarm sleeve seam and the rest of the side seam (from underarm to the bottom of the poncho).
7. Attach the hood to the top of the poncho. It looks like the hood side seam should line up with one of the sleeve seams to help guide its placement. For the front, remember that you will be sewing through both poncho fronts as well as the hood.
8. Hem the sleeves and the entire bottom edge of the poncho.
9. Admire and wear.
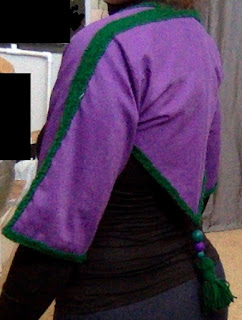
So here are a couple pictures of it being worn, taken by my mom's friend- Benjamin Cooper of CrazyMonkeyCreations

 As a first major project, this was a good challenge that stretched my skills and taught me a lot. I've not worn this poncho all that much (it is rather green irl), but it is very cozy and warm on cold winter days when I can stay inside and curl up with a book.
What I learned: how to sew with a machine, how to work with polar fleece, pattern layout, how to work from a schematic, how to make pockets, how to make a hood

I didn't really come across a true pattern, but (with help from my mom) finally came across these schematics (which I also don't have attribution for)


I chose a green polar fleece fabric, so that it would be nice and cozy. This was all machine sewn. As this was my first 'real'/major sewing project, I didn't really take any pictures of the process. But here are the basic steps that we wrote down:
Here is the approximate method that I used to make the poncho. I'm sure there are other ways it can be done.
You'll need two of every pattern piece except for the hood front. (Ben provided them already, with the regular and the mirror image pattern pieces). You only need one hood front. If you have 58-60" wide directional fabric, you'll need about 3 yards. You'll obviously need more for narrower fabric. A few of the pattern pieces don't have all the lines drawn on them, but it should be pretty obvious which lines are missing.
Seams are 1cm. Grain lines are marked on the pattern pieces.
1. Sew the sides of the hood to the hood front. Sew the seam that runs from the top of the hood down the back of the hood. Hem the face opening. Set this aside for now.
2. Make the welt pockets for each of the front pieces. Each pocket will use the rectangular welt piece and the two pocket pieces. We followed this tutorial: http://www.craftsy.com/article/sewing-welt-pockets
3. Sew the seam down the center of the back pieces. Sew the front sleeve to the back sleeve at the shoulder line (for each sleeve). The back sleeve has the pointy top while the front sleeve has a more rounded top.
4. Sew the back of the poncho to the back of each sleeve, down to the proper spot (there is a mark on the pattern pieces).
5. Pin the two front pieces to the sleeve fronts, lining them up so they overlap in the correct way. Fold down the edge of the fronts as you pin them since they will need to be hemmed later. Sew this seam down to the proper spot (there is a mark on the pattern pieces)
6. Pin and sew the underarm sleeve seam and the rest of the side seam (from underarm to the bottom of the poncho).
7. Attach the hood to the top of the poncho. It looks like the hood side seam should line up with one of the sleeve seams to help guide its placement. For the front, remember that you will be sewing through both poncho fronts as well as the hood.
8. Hem the sleeves and the entire bottom edge of the poncho.
9. Admire and wear.
So here are a couple pictures of it being worn, taken by my mom's friend- Benjamin Cooper of CrazyMonkeyCreations


What I learned: how to sew with a machine, how to work with polar fleece, pattern layout, how to work from a schematic, how to make pockets, how to make a hood

Comments
Post a Comment